


Composition / ingredients
Step-by-step cooking
Step 1:
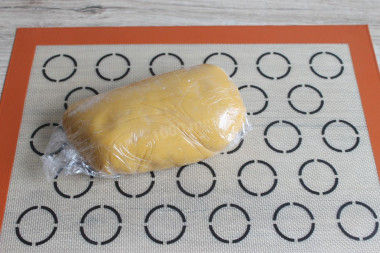
We make topers or just gingerbread cakes for Easter. I have the dough ready. You can take your favorite recipe. I have my own recipe, there is a link to it at the bottom. So, we take the dough out of the refrigerator. We give him half an hour to lie on the table. Because it's solid at first.
Step 2:

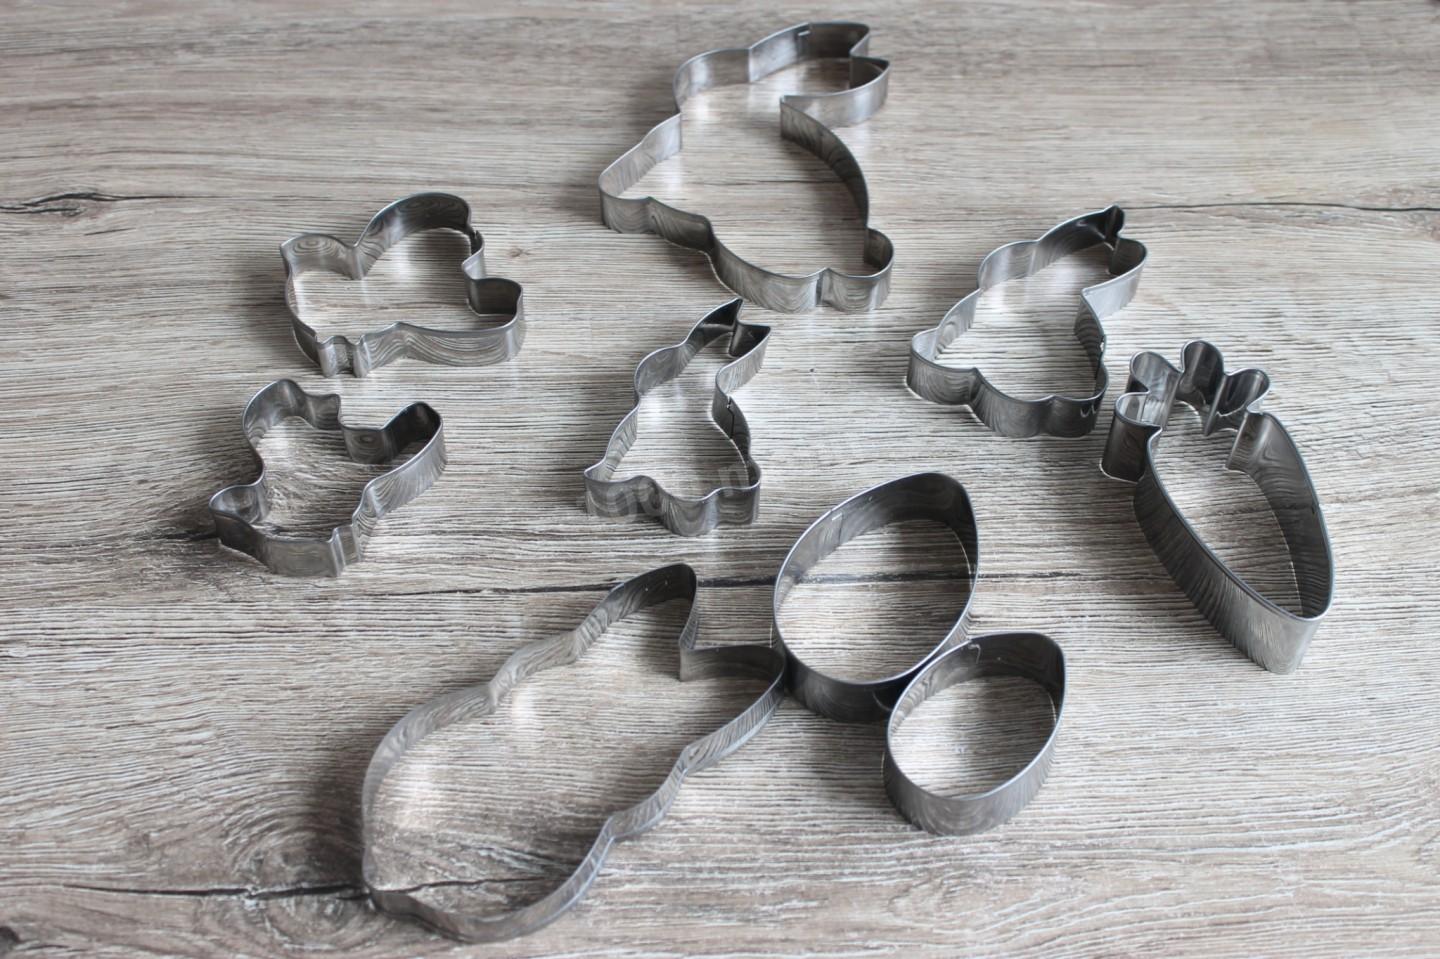
Prepare the molds for cutting gingerbread. I've had these.
Step 3:
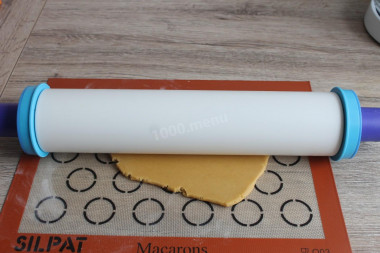
Cut a piece of dough. We knead it in our hands. And roll out 6 mm thick. My rolling pin is already exposed to a height of 6 mm.
Step 4:
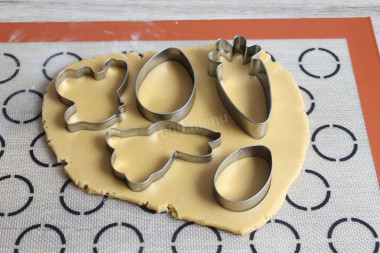
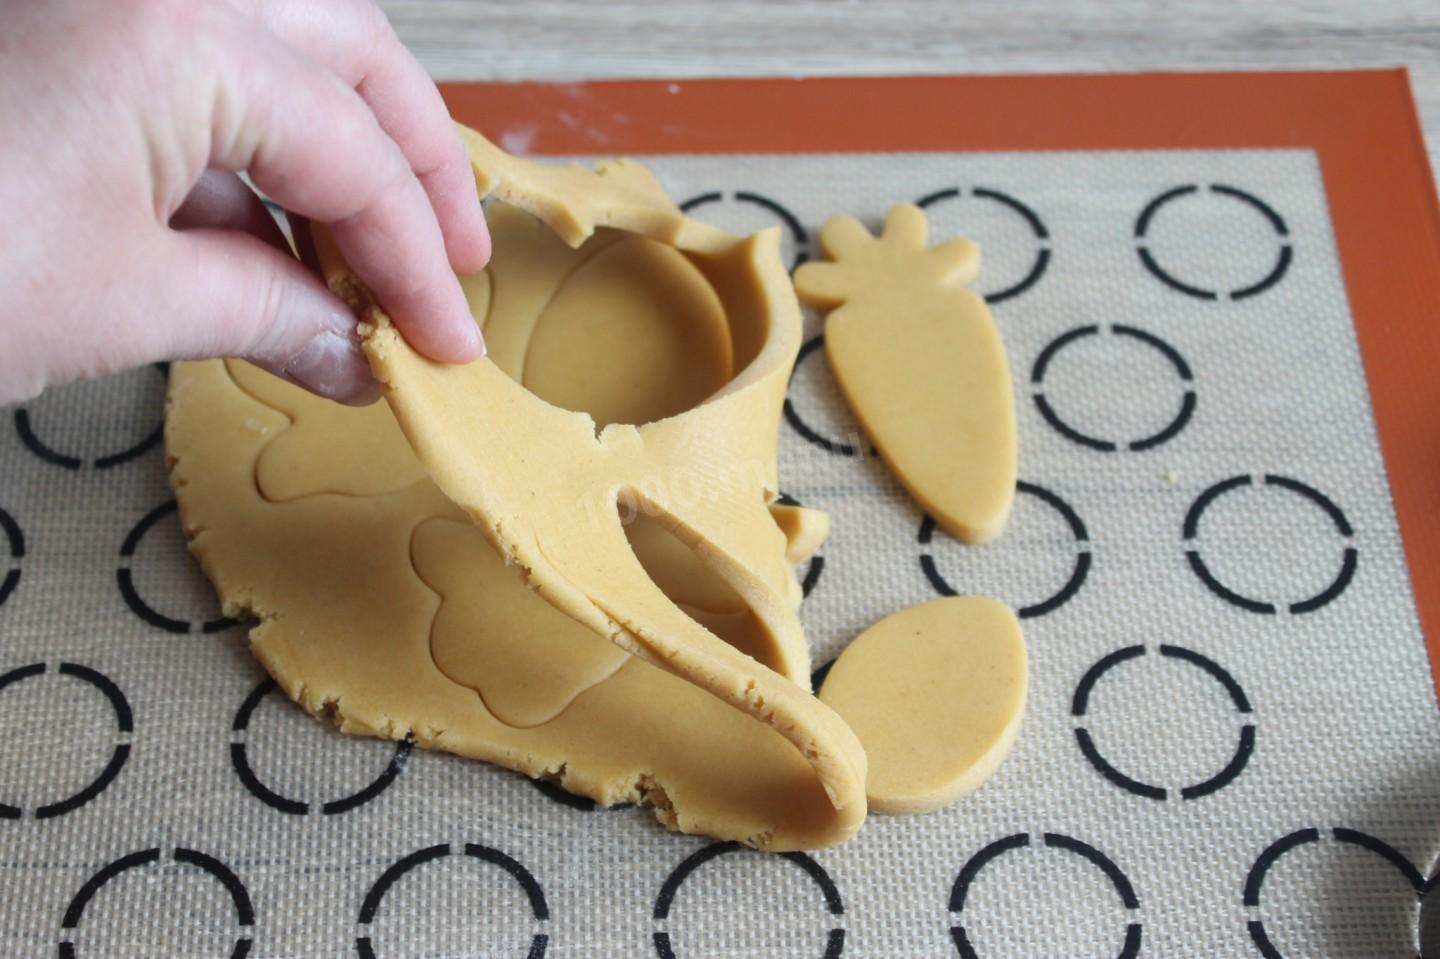
We squeeze out our figures with molds.
Step 5:

Remove the excess dough.
Step 6:
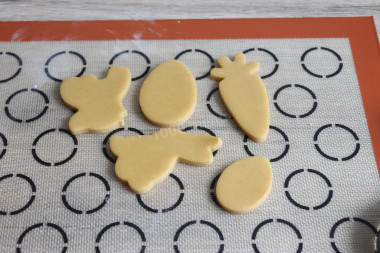
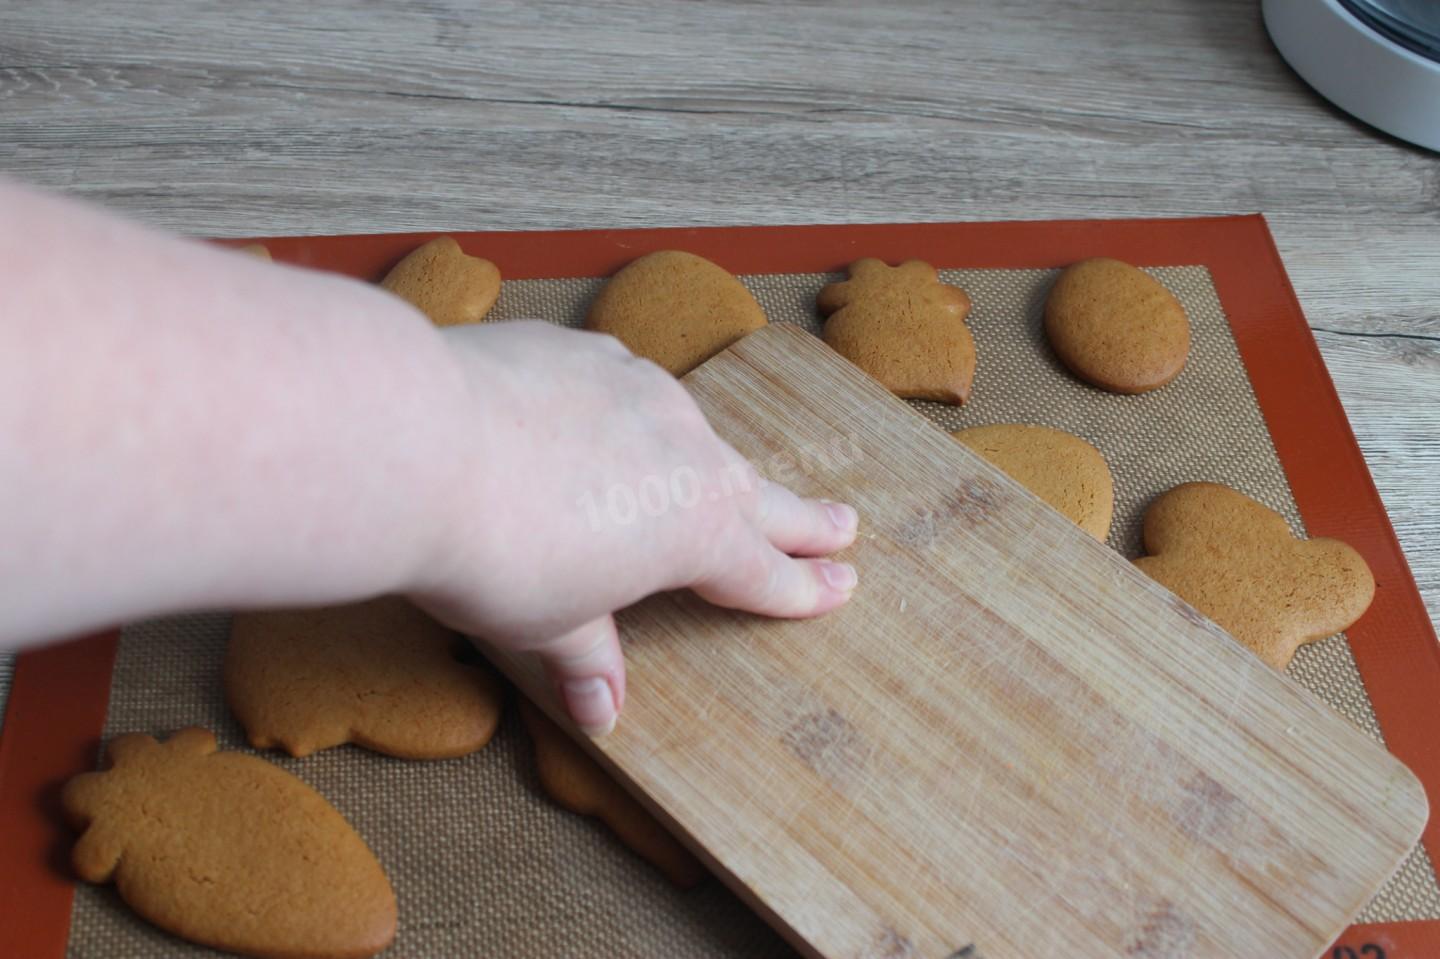
Can be left like this on the mat. In general, it is recommended to do so. That is, roll out a large layer of dough and squeeze out all the figures at once. But it is necessary to observe the distance between them.
Step 7:
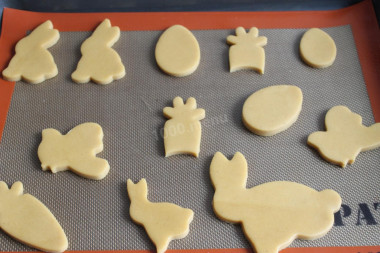
It is undesirable to transfer gingerbread. But it's not the first time I've done it, I've gotten the hang of it. And this is how they will look. The oven is preheated to 200 degrees. We put gingerbread cookies to bake. It takes me exactly 10 minutes.
Step 8:
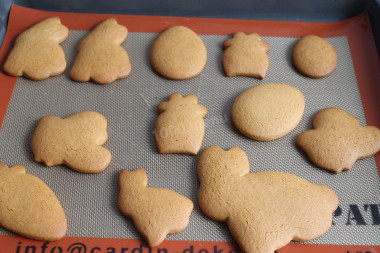
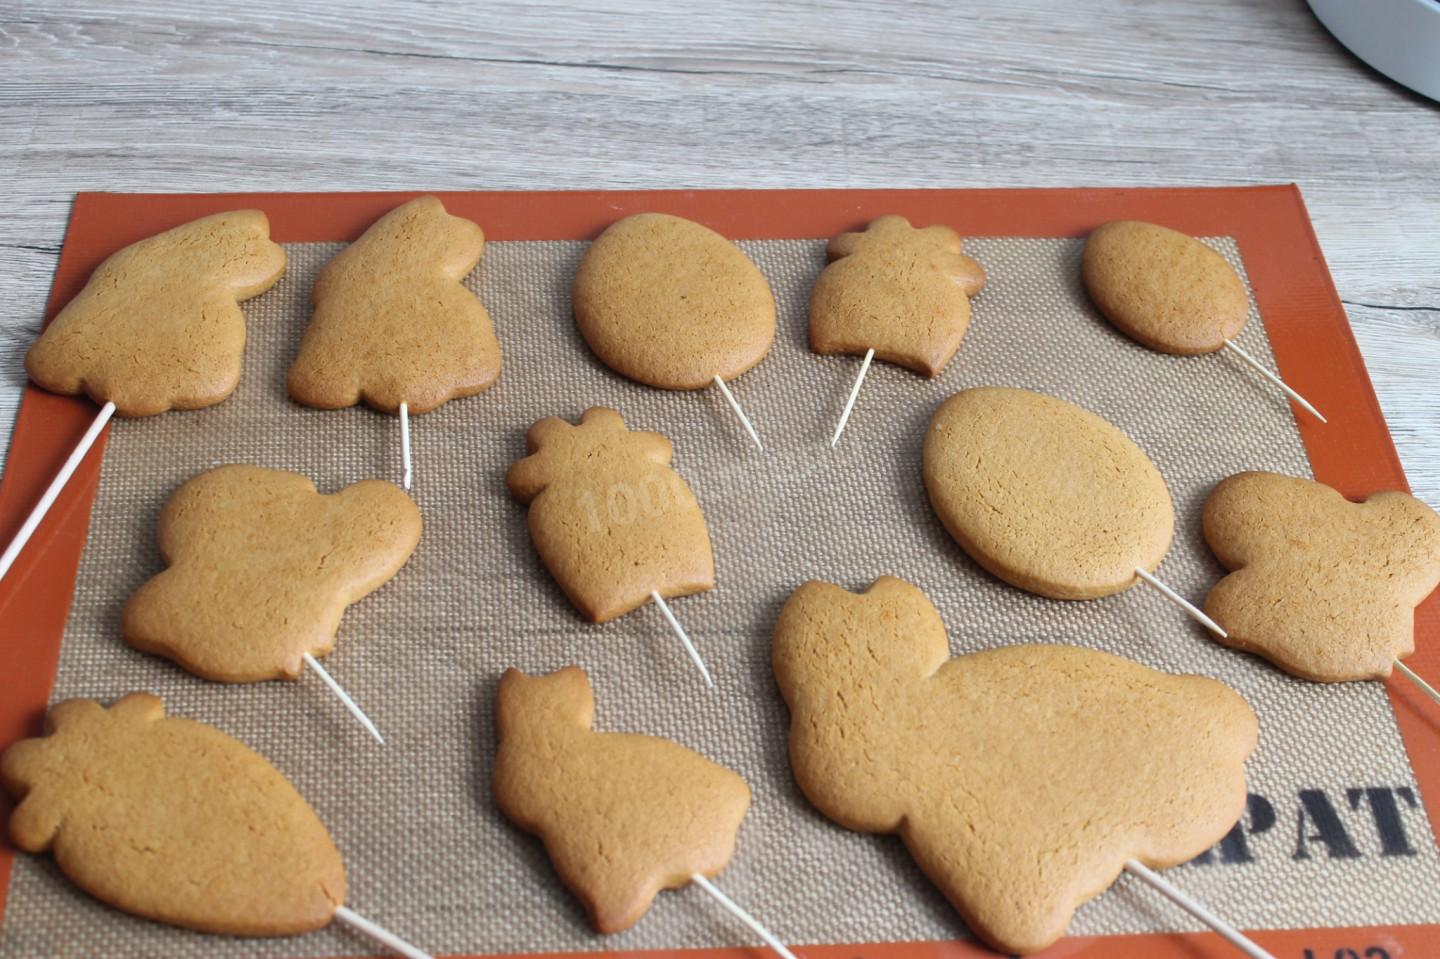
That's how they turn out. If they are overexposed, then the gingerbread will be dry, if not baked - raw. So try to find the middle ground. Maybe 8 minutes will be enough for you. It may take 15. Always focus on your oven, they are all different.
Step 9:
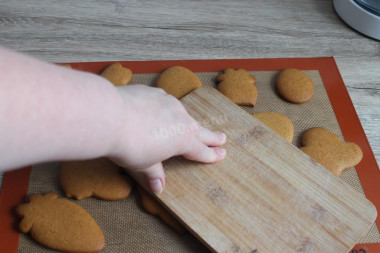
I immediately press them down slightly with a stick. So that they are even. But you don't have to do that. You can paint them on the other side, where they are even.
Step 10:

Immediately, when they are still hot, we take toothpicks or wooden skewers and screw them neatly into gingerbread. And so we leave them to cool down further. Some stick toothpicks right in front of the oven. You can do this and that.
Step 11:
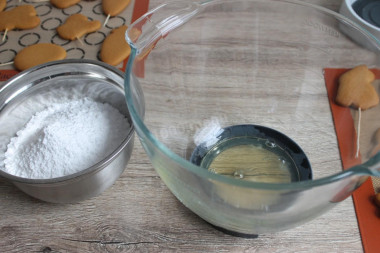
For the glaze, we weigh the proteins and powdered sugar. If you need some icing, how to calculate? Take, for example, 1 protein, weigh it and multiply this figure by 5.5. The resulting number is the weight of your powdered sugar. My dough is always in the refrigerator, wrapped in cellophane. If I need a gingerbread for a cake, then I cut a piece and bake it. And then I make the glaze, sometimes even with half the protein.
Step 12:
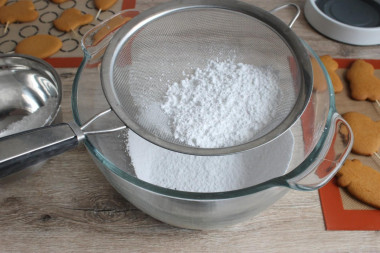
Sift the powdered sugar into the proteins. And stir everything with a spatula.
Step 13:
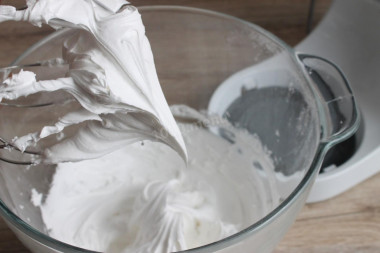
Next, beat with a mixer at medium speed for 5 minutes. It is not necessary to beat strongly. In the middle of the process, add our lemon juice. This is for the whiteness of the glaze, well, and for the taste. Someone does not add. This is how the glaze will look.
Step 14:
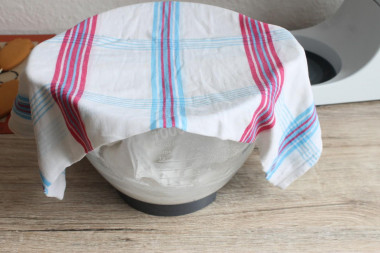
Now cover our mixer bowl with a wet towel. Let's leave it like this for half an hour. We need this so that extra air bubbles come out. We do it for sure!
Step 15:
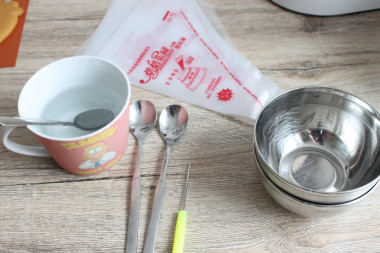
While our glaze is resting, we will prepare what we need next. These are small cups, teaspoons, disposable bags, very cold water, a needle or a toothpick.
Step 16:

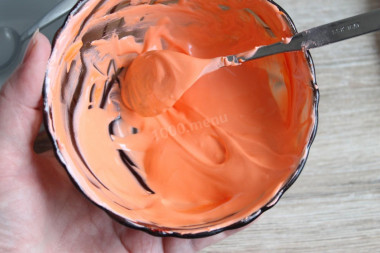
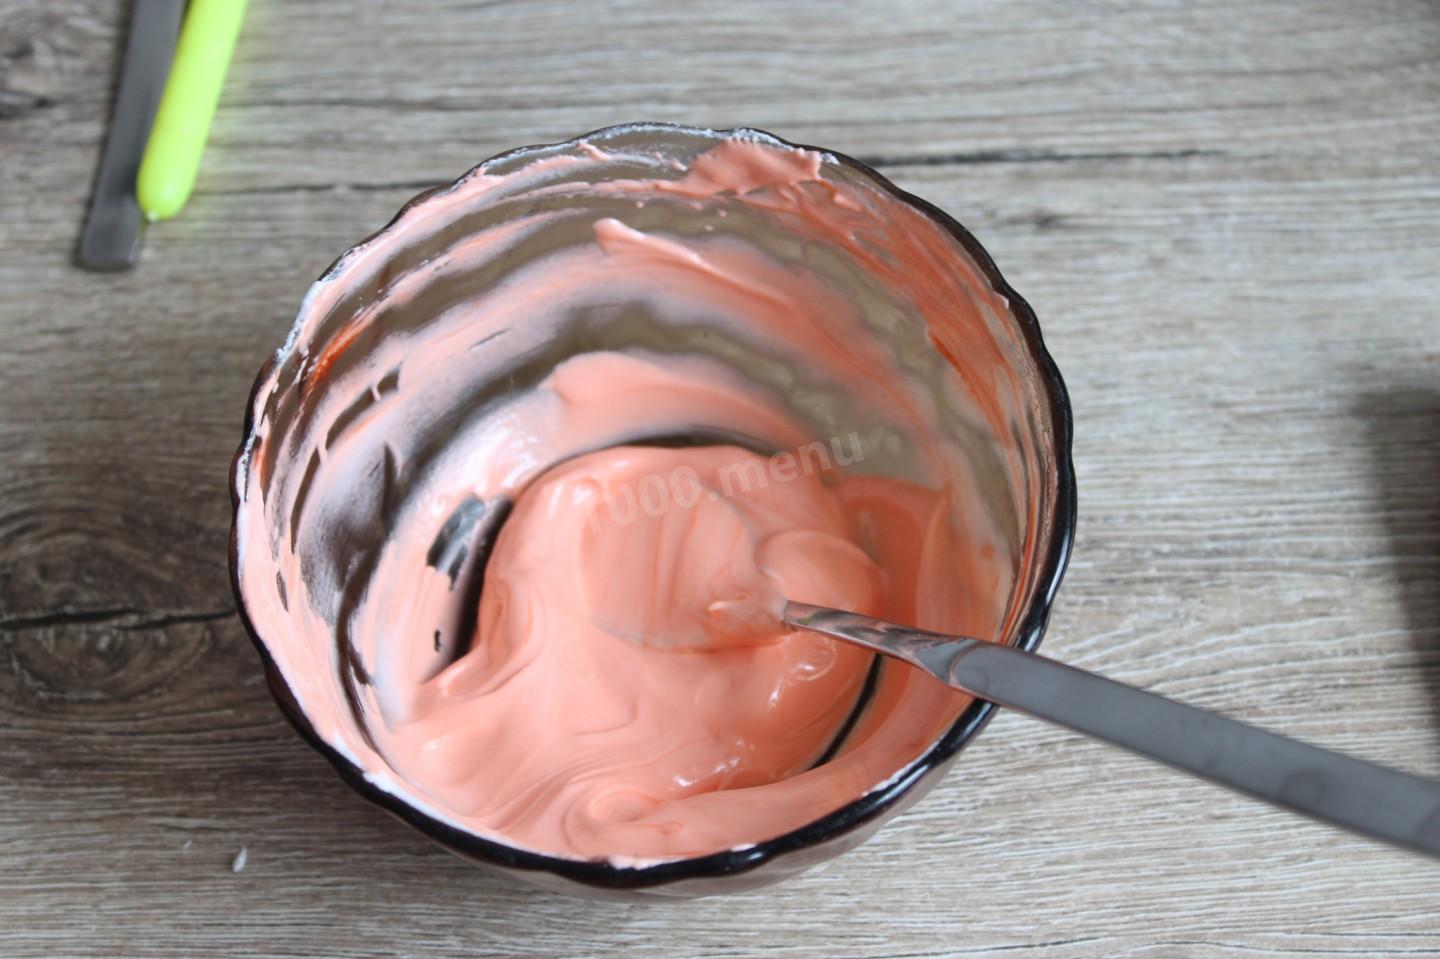
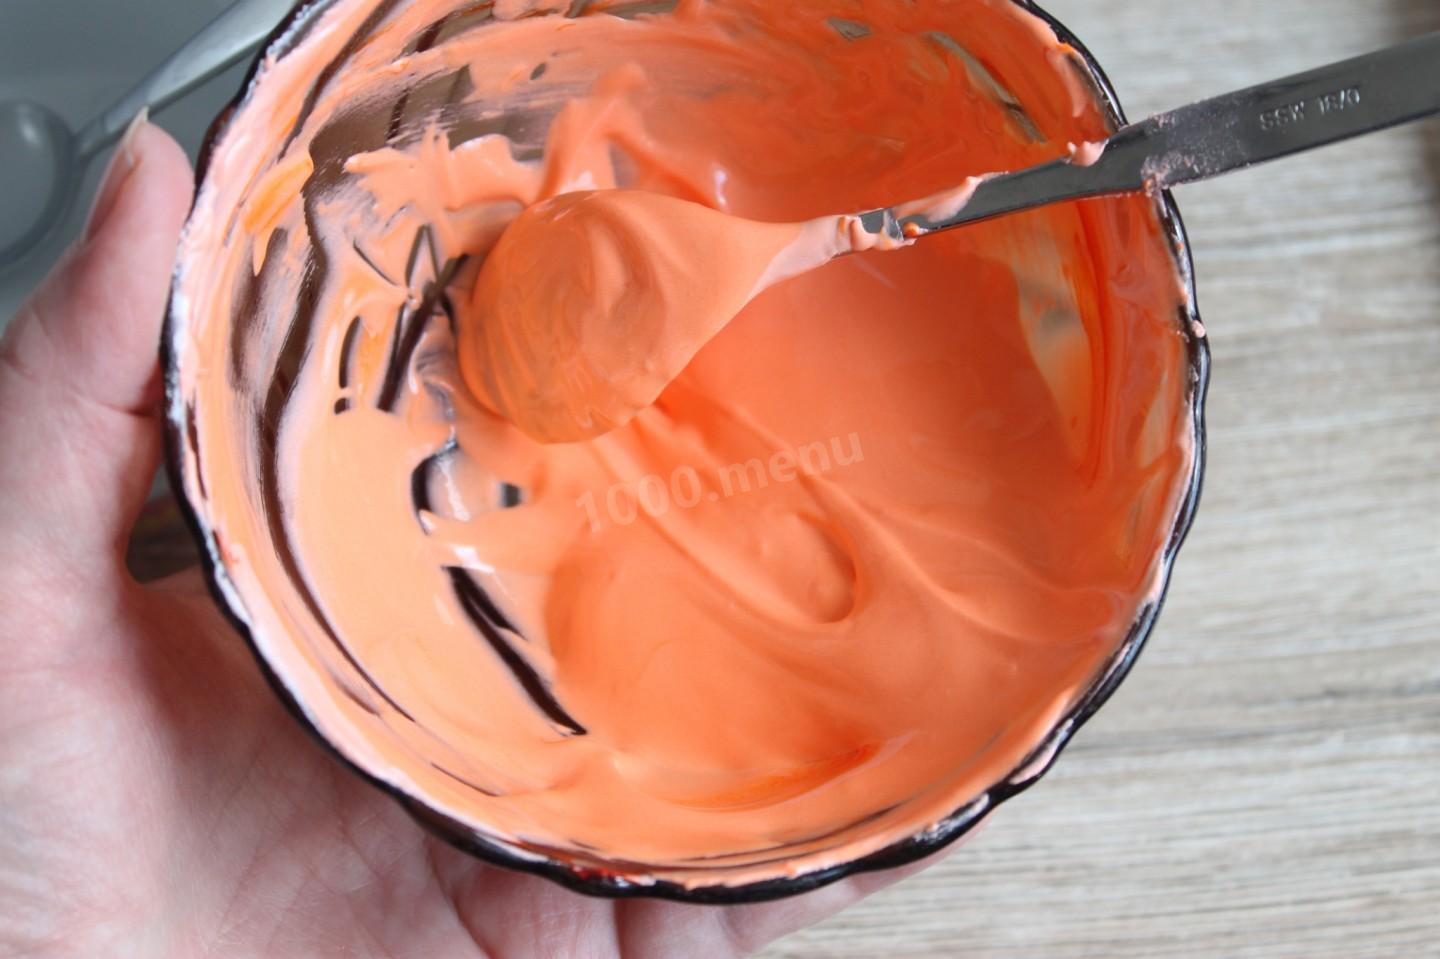
Now we color our glaze. I have gel dyes. We put a little glaze in a cup. First add a drop of dye or dip a toothpick in the dye. This is sometimes enough. Stir it up. Then add water drop by drop. Here you need to see what you will do.
Step 17:
To fill the gingerbread, we need such a consistency that if we run a spoon over the glaze, there will be such a furrow. Now we are counting how long it will disperse. Shake the cup slightly or knock. To fill, we need to count to 5. If the glaze has dispersed, then there is enough water. For a more rigid contour, we count up to 10. Of course, the video is much clearer, but I will try to explain in words.
Step 18:
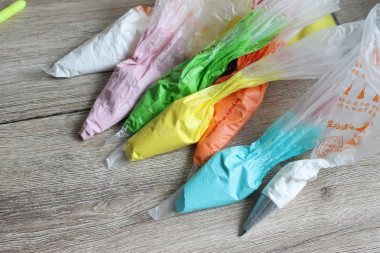
Thus, we will prepare different colors. Please note that all this time the glaze in the cup is covered with a damp towel. Because it dries quickly.
Step 19:
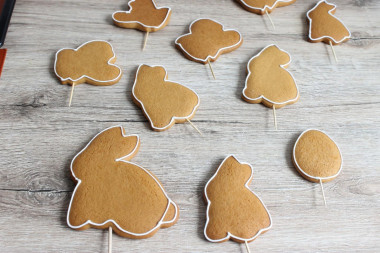
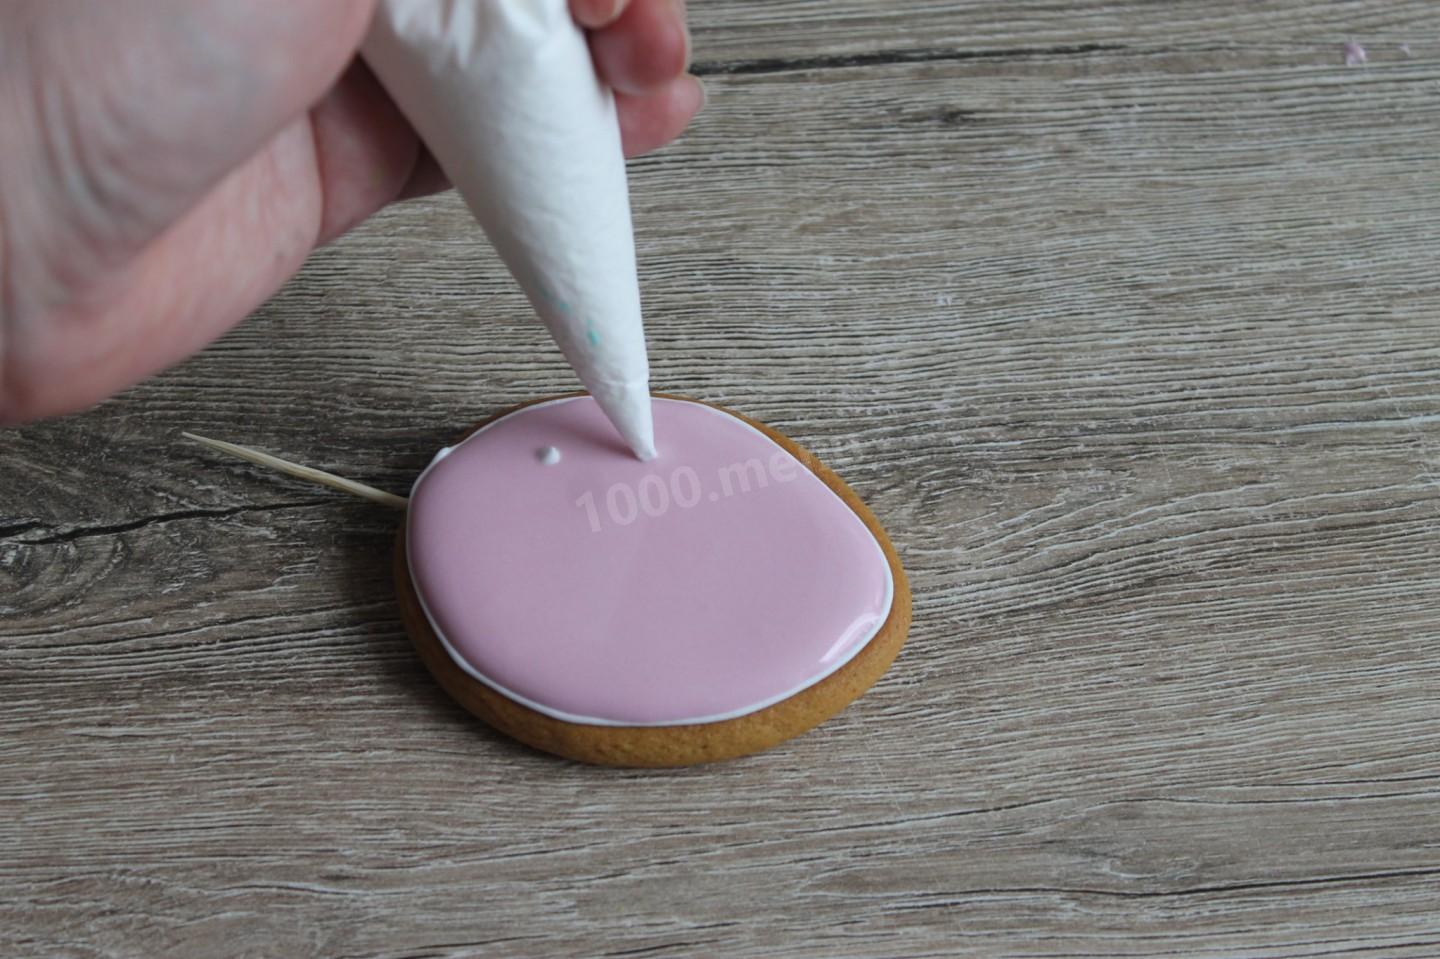
I make the outline first. To do this, I take the nozzle 0. Everything that we will have next is white, the contour is also white.
Step 20:
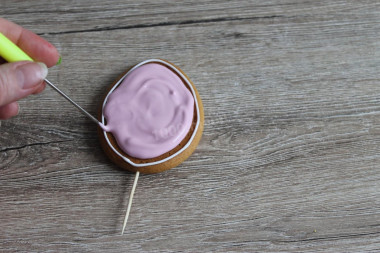
Now the main stage. Fill. We do it in a circle. We help with a needle along the edges.
Step 21:

Now we do tapping or shake from side to side. The glaze will disperse. If there is not enough glaze somewhere, then add a drop. And I immediately make a drawing in a different color. Also, when you work with bags of glaze, you should cover them with a wet towel every time. So that they don't dry out.
Step 22:

To make the glaze smooth and dry quickly, put the sheet in the oven for 10 minutes at 50 degrees. With the door open, it is possible with a fan.
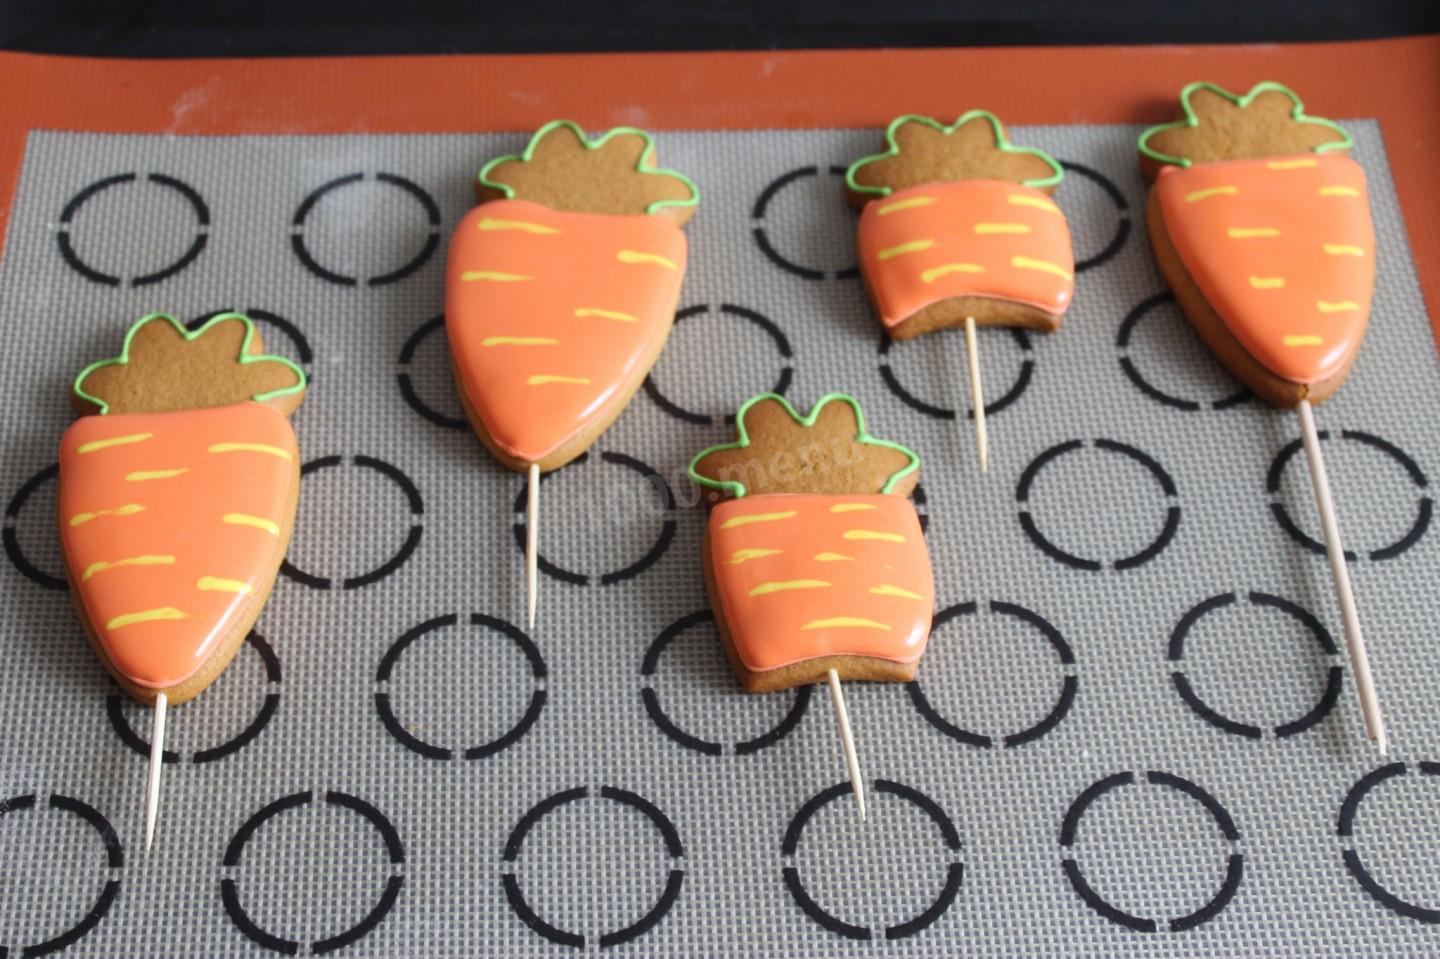
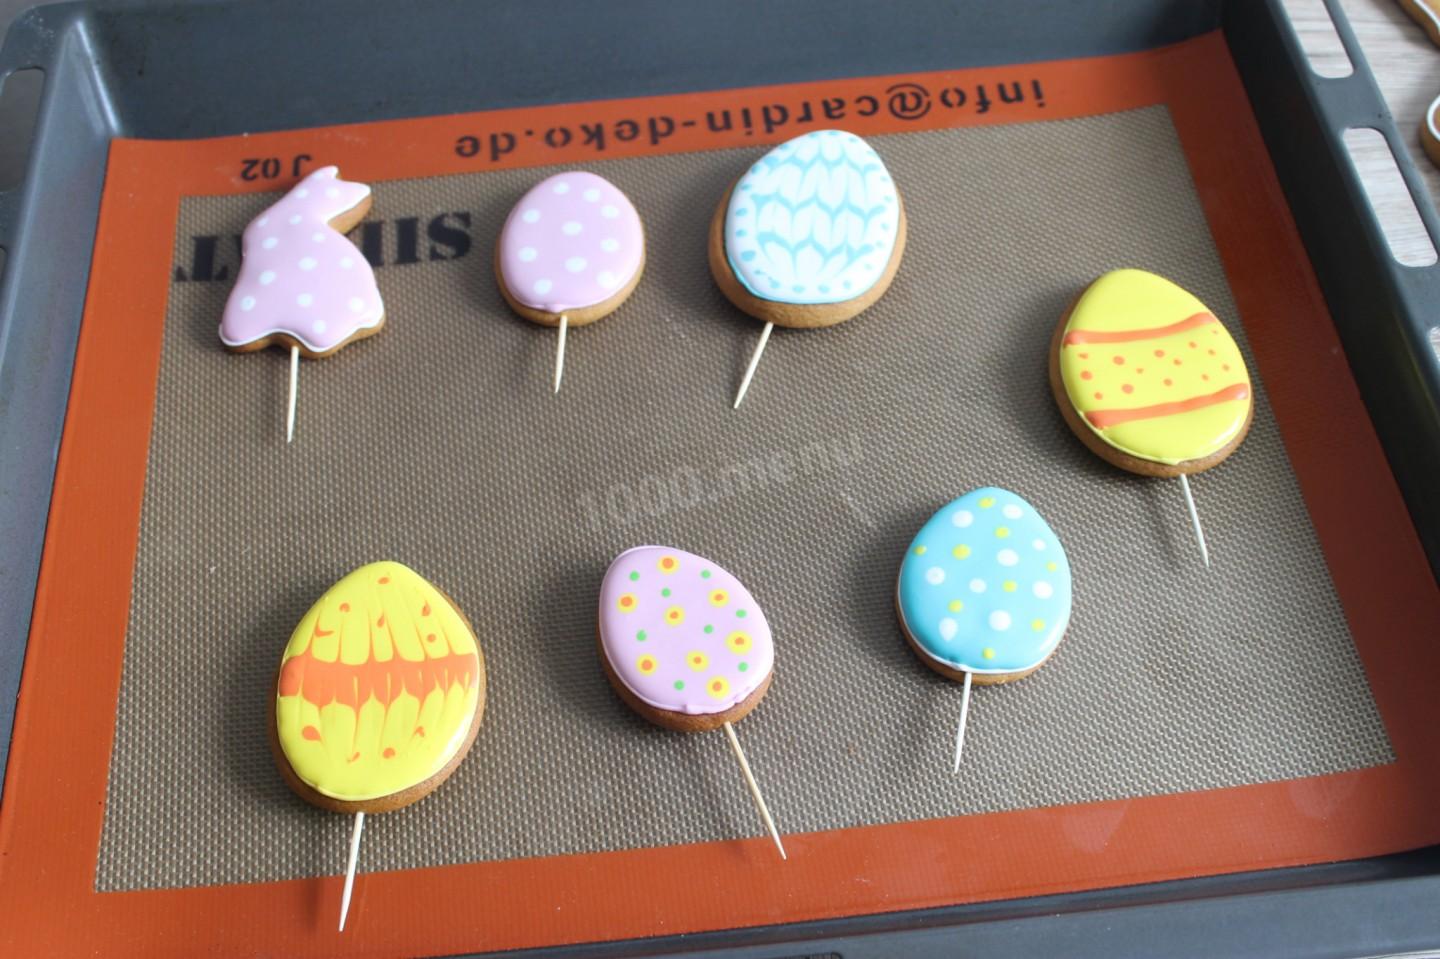
Step 23:

And such are the gingerbread cookies. Well, it's all your imagination.
Step 24:
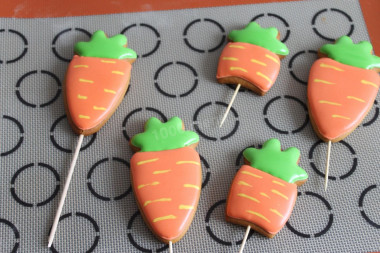
Let our topers dry completely. I leave them on the table for at least 8 hours. Then you need to put it in bags or some kind of container with a lid. I made these painted gingerbread cookies for Easter cakes.
Step 25:

Have a good Easter! Take care of yourself!
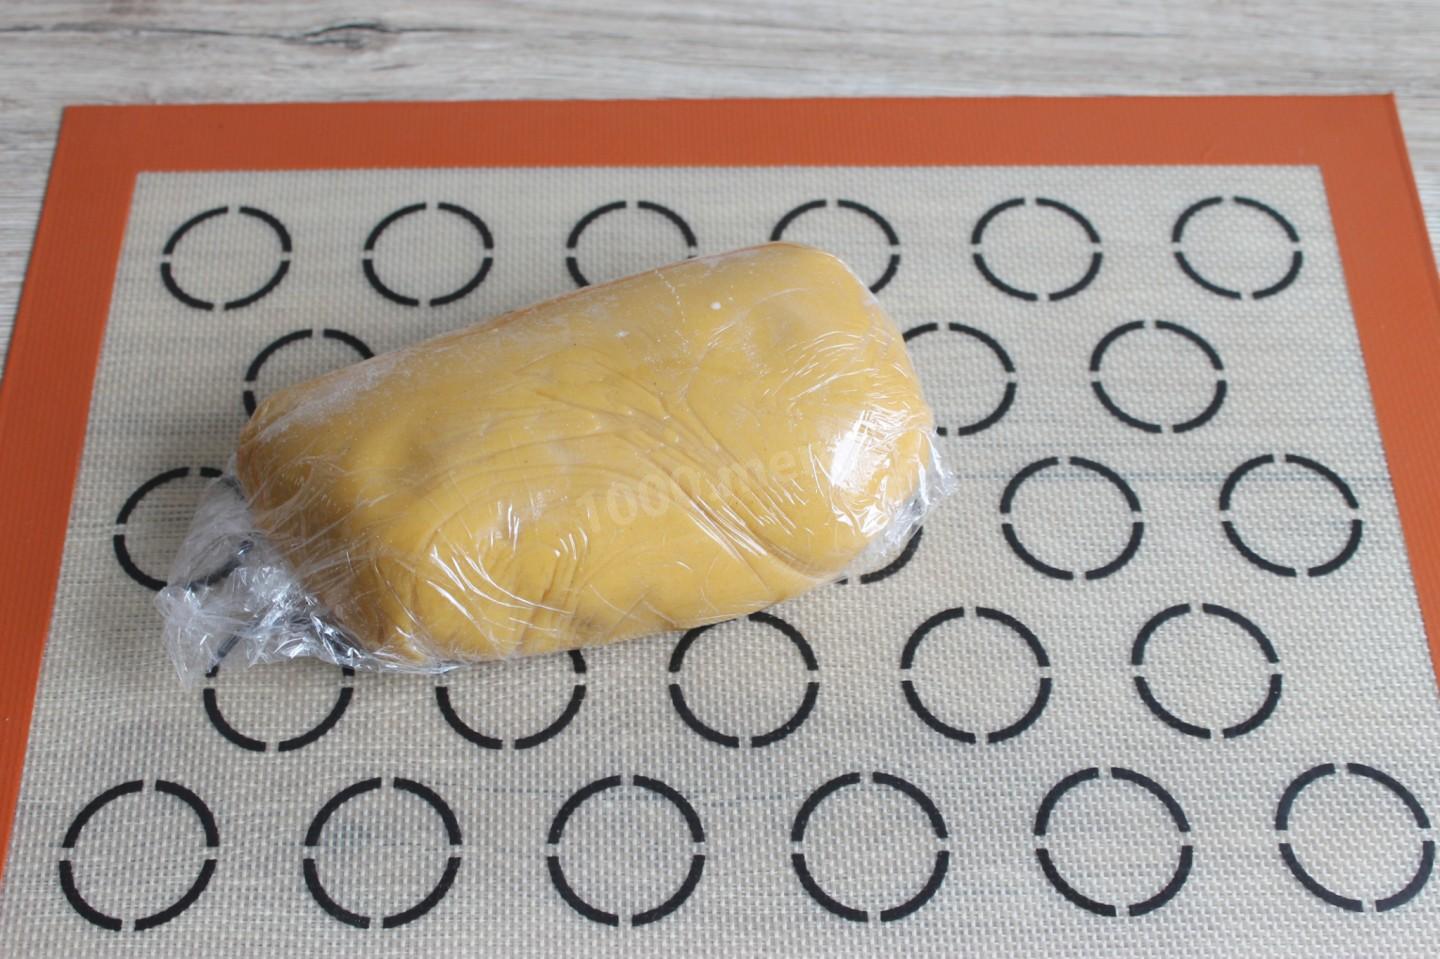


I also want to write how I make dough for gingerbread. Take a saucepan with a thick bottom, put honey and sugar. Over low heat, bring to the dissolution of sugar. But we don't boil it. Next, add salt and spices. You can have a spoonful of cocoa. Then soda. The mass begins to foam. Now add the oil. The oil should dissolve. And we remove it immediately from the fire. That is, we do not boil. We put it to cool down to room temperature. Then pour the mass into the bowl of the mixer, add the egg and whipping at a slow speed, add the sifted flour. The nozzle is first a whisk and then a hook . We add flour, but not all of it. When the mass becomes very thick, we spread it on the table and pour the remaining flour. Knead the dough. It doesn't stick to your hands. We put it in a bag and put it away in the cold for the night. You can store this dough in the refrigerator for a long time, up to 3 weeks. Enjoy your meal.
Recipe with step-by-step photos
honey dough for gingerbread for painting here
.
Caloric content of the products possible in the composition of the dish
- Chicken egg - 157 kcal/100g
- Egg white - 45 kcal/100g
- Egg powder - 542 kcal/100g
- Egg yolk - 352 kcal/100g
- Ostrich egg - 118 kcal/100g
- Honey - 400 kcal/100g
- Cinnamon - 247 kcal/100g
- Whole durum wheat flour fortified - 333 kcal/100g
- Whole durum wheat flour, universal - 364 kcal/100g
- Flour krupchatka - 348 kcal/100g
- Flour - 325 kcal/100g
- Granulated sugar - 398 kcal/100g
- Sugar - 398 kcal/100g
- Butter 82% - 734 kcal/100g
- Amateur unsalted butter - 709 kcal/100g
- Unsalted peasant butter - 661 kcal/100g
- Peasant salted butter - 652 kcal/100g
- Melted butter - 869 kcal/100g
- Salt - 0 kcal/100g
- Lemon juice - 16 kcal/100g
- Powdered sugar - 374 kcal/100g
- Baking soda - 0 kcal/100g
- Egg whites - 44 kcal/100g
- Ginger Powder - 335 kcal/100g