Thick caramel cream for cake
A fragrant, irresistible alternative cream for homemade cakes. Give it a try. This cream isn't hard to make, and it's also a lot of fun: it brings back childhood memories of trying to make caramel or hard candy at home. The key is to be patient and to work in an organized, quick way, so the caramel doesn't burn and blends evenly with the other ingredients into a smooth, quality cream. For this cream, it's better to use thick, high-fat cream—then the finished cream will be thick and hold its shape well. That matters for anyone who likes to decorate the top of a cake with various swirls, flowers, and other patterns that shouldn't spread out on the finished cake. If you don't plan to decorate the cake that way and will only use the caramel cream as a filling, you can use lower-fat cream. And one more important point: the cream comes out fairly sweet, so I'd suggest layering it between unsweetened or barely sweet cake layers. For example, this cream is good for a Napoleon-style cake. By the way, the cream can also be used as a dessert on its own—spread it on store-bought cookies, for instance. Either way, I hope you enjoy making and tasting this wonderful dessert!


Cooking method
-
Step 1:
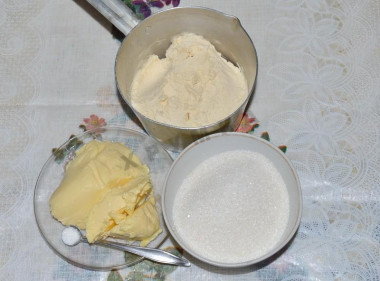
The ingredients you'll need to make caramel cream for cake.
-
Step 2:
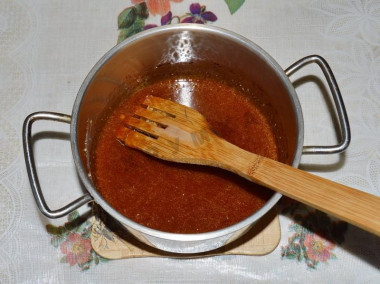
To make the caramel cream, take a small, heavy-bottomed saucepan (mine is steel). Add the sugar and let it melt completely over medium heat. The sugar will start to caramelize and turn a nice brown color.
-
Step 3:
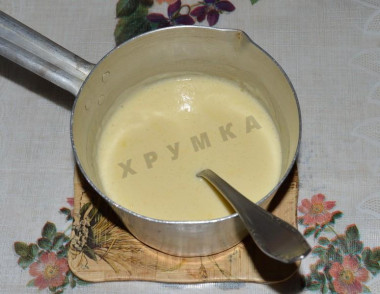
At the same time, heat the cream in the microwave (1.5 minutes at 700 W). If you don't use a microwave, you can do it on the stove over low heat, stirring the cream constantly. Important: The cream must be hot, otherwise combining cold cream with hot sugar will give you one big hard lump. But that's not a problem, because the sugar will melt again in the end anyway.
-
Step 4:
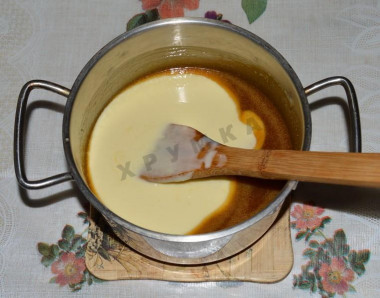
Pour the hot cream in a thin stream into the browned sugar and stir until smooth. Small bits of hardened sugar may form, but that's fine—as it boils, the sugar will melt into the cream with vigorous stirring. Cook until smooth, but not for long—just until the mixture thickens slightly.
-
Step 5:
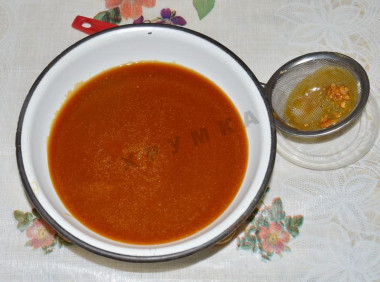
Take it off the heat and pour the caramel sauce into another bowl so it cools faster. To be safe, strain the caramel sauce—it takes no more than a minute and is worth it, since the cream will come out smooth, with no grains. Chill the sauce in the refrigerator.
-
Step 6:
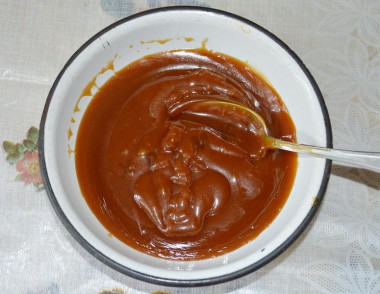
Once cooled, the sauce should be neither runny nor too thick—roughly like in the photo.
-
Step 7:
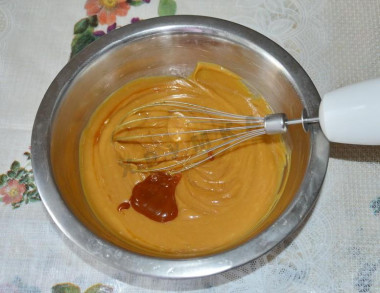
Then beat the well-softened butter (left at room temperature) in another bowl or a blender cup for 5 minutes. The whipped butter becomes fluffy and beautifully glossy. Now add the well-chilled caramel sauce to it a little at a time—about 1 teaspoon per addition. Beat the cream well after each spoonful. The caramel cream comes out fluffy. Chill it in the refrigerator and use it as needed. Enjoy your meal!


- My cream came out thick—probably because of the farm-fresh cream. It holds its shape very well, especially when chilled, so you can decorate cakes with it. If you want cream just for decorating the cake, you can scale the batch down: leave out 50 g of sugar and 100 ml of cream. Note: when I gave 1 serving of cream in the recipe, I meant that the amount of cream I made is enough to layer one medium cake!
Caloric content of the products possible in the composition of the dish
- Buttermilk - 36 kcal/100g
- Cream 20% fat - 300 kcal/100g
- Cream 10% fat - 120 kcal/100g
- Cream - 300 kcal/100g
- Granulated sugar - 398 kcal/100g
- Sugar - 398 kcal/100g
- Vanilla - 288 kcal/100g
- Butter 82% - 734 kcal/100g
- Amateur unsalted butter - 709 kcal/100g
- Unsalted peasant butter - 661 kcal/100g
- Salted peasant butter - 652 kcal/100g
- Clarified butter - 869 kcal/100g